Arduino gesture sensor tutorial
In this tutorial, we’ll hook up an gesture sensor to a dizmo; we’re going to use an Arduino and WebSockets.
Parts needed
- Sparkfun APDS-9660 Gesture Sensor
- Arduino Ethernet
- Level converter
- Breadboard
- Jumper cables
- Serial to USB Adaptor: https://www.sparkfun.com/products/9716
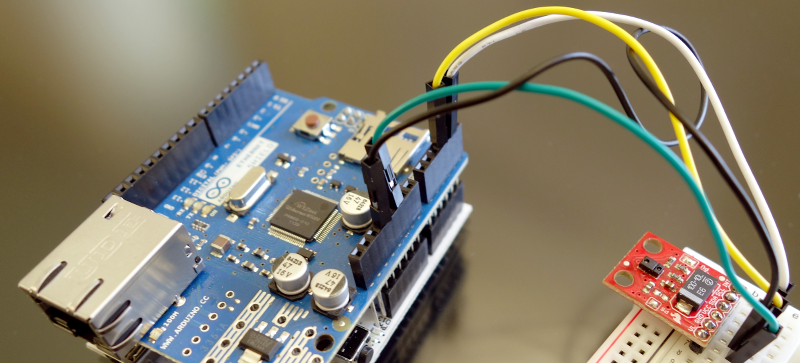
Electrical hookup
Our sensor, the Avago APDS-9960, offers ambient light and color (as clear, red, green, and blue) measuring, proximity detection, and gesture sensing.
We need an Arduino that can connect to a network. It can be either an Arduino with an Ethernet Shield, or as we are using, an Arduino Ethernet.
Level shifting: if you are using a 5V Arduino, you’ll need to use a level-shifter to convert the 5V Signal to 3.3V that the sensor uses.
The APDS-9960 breakout board provides six pins to provide power to the sensor and I2C bus. We’ll only use five of those pins.
| Arduino pin | Gesture sensor pin |
|---|---|
| D2 | INT |
| 3.3V | VCC |
| GND | GND |
| A4 | SDA |
| A5 | SCL |
When using a level converter, pass the data signals SDA,SCL and INT through pins A1, A2 and A3 of the level converter. This converts 3.3V on the sensor side to 5V that the Arduino needs and vice versa. Connect the HV pin of the level converter to the 5V pin of the Arduino and the LV pin to the 3.3V pin of the Arduino.
Arduino library installation
Our Arduino code needs two libraries, one to talk to the gesture sensor, another one to implement the WebSocket server. Download them from their respective Github repositories:
Install these libraries by following this guide: https://learn.sparkfun.com/tutorials/installing-an-arduino-library
WebSocket server Arduino code – running the gesture sensor engine
Open the Arduino IDE and paste the following code to create a WebSocket server and start running the gesture sensor engine.
#include <SPI.h>
    #include <Wire.h>
    #include <Ethernet.h>
    #include <SparkFun_APDS9960.h>

    // Enabe debug tracing to Serial port.
    #define DEBUG true
    #define STATICIP false

    // Pins
    #define APDS9960_INT    2 // Needs to be an interrupt pin

    // Here we define a maximum framelength to 64 bytes. Default is 256.
    #define MAX_FRAME_LENGTH 64

    #include <WebSocket.h>

    byte mac[] = { 0x90, 0xA2, 0xDA, 0x00, 0x91, 0x8C };

    #if STATICIP
    byte ip[] = {10,0,1,100};
    #endif

    // Create a Websocket server
    WebSocketServer wsServer;

    void onConnect(WebSocket &socket) {
    Serial.println("onConnect called");
    }

    // You must have at least one function with the following signature.
    // It will be called by the server when a data frame is received.
    void onData(WebSocket &socket, char* dataString, byte frameLength) {

    #ifdef DEBUG
    Serial.print("Got data: ");
    Serial.write((unsigned char*)dataString, frameLength);
    Serial.println();
    #endif

    // Just echo back data for fun.
    socket.send(dataString, strlen(dataString));
    }

    void onDisconnect(WebSocket &socket) {
    Serial.println("onDisconnect called");
    }


    // Global Variables
    SparkFun_APDS9960 apds = SparkFun_APDS9960();
    int isr_flag = 0;


    void setup() {
    #ifdef DEBUG
    Serial.begin(9600);
    #endif

    #if STATICIP
    Ethernet.begin(mac, ip);
    #else
    if (Ethernet.begin(mac) == 0) {
    #if DEBUG
    Serial.println("Unable to set server IP address using DHCP");
    #endif
    for(;;)
    ;
    }
    #if DEBUG
    // report the dhcp IP address:
    Serial.println(Ethernet.localIP());
    #endif
    #endif

    wsServer.registerConnectCallback(&onConnect);
    wsServer.registerDataCallback(&onData);
    wsServer.registerDisconnectCallback(&onDisconnect);
    wsServer.begin();

    delay(100); // Give Ethernet time to get ready


    // Set interrupt pin as input
    pinMode(APDS9960_INT, INPUT);

    // Initialize interrupt service routine
    attachInterrupt(0, interruptRoutine, FALLING);

    // Initialize APDS-9960 (configure I2C and initial values)
    if ( apds.init() ) {
    Serial.println(F("APDS-9960 initialization complete"));
    } else {
    Serial.println(F("Something went wrong during APDS-9960 init!"));
    }

    // Start running the APDS-9960 gesture sensor engine
    if ( apds.enableGestureSensor(true) ) {
    Serial.println(F("Gesture sensor is now running"));
    } else {
    Serial.println(F("Something went wrong during gesture sensor init!"));
    }

    }

    void interruptRoutine() {
    isr_flag = 1;
    }

    String handleGesture() {
    String gesture;
    gesture="NONE  ";

    if ( apds.isGestureAvailable() ) {
    switch ( apds.readGesture() ) {
    case DIR_UP:
    Serial.println("UP   ");
    gesture="UP";
    break;
    case DIR_DOWN:
    Serial.println("DOWN");
    gesture="DOWN ";
    break;
    case DIR_LEFT:
    Serial.println("LEFT");
    gesture="LEFT ";
    break;
    case DIR_RIGHT:
    Serial.println("RIGHT");
    gesture="RIGHT";
    break;
    case DIR_NEAR:
    Serial.println("NEAR");
    gesture="NEAR  ";
    break;
    case DIR_FAR:
    Serial.println("FAR");
    gesture="FAR  ";
    break;
    default:
    Serial.println("NONE");
    gesture="NONE ";
    }
    }

    return gesture;

    }

    String rv;
    char gest[6];

    void loop() {
    // Should be called for each loop.
    wsServer.listen();

    // Do other stuff here, but don't hang or cause long delays.
      delay(100);

      if( isr_flag == 1 ) {
        detachInterrupt(0);
        rv=handleGesture();
        isr_flag = 0;
        attachInterrupt(0, interruptRoutine, FALLING);

      if (rv!="NONE ") {

        if (wsServer.connectionCount() > 0) {
          rv.toCharArray(gest, 6);
          wsServer.send(gest, 6);
        }

      }

      }

    }
Transfer the sketch to your Arduino and open the serial console and note the printed IP address :
192.168.1.194
    APDS-9960 initialization complete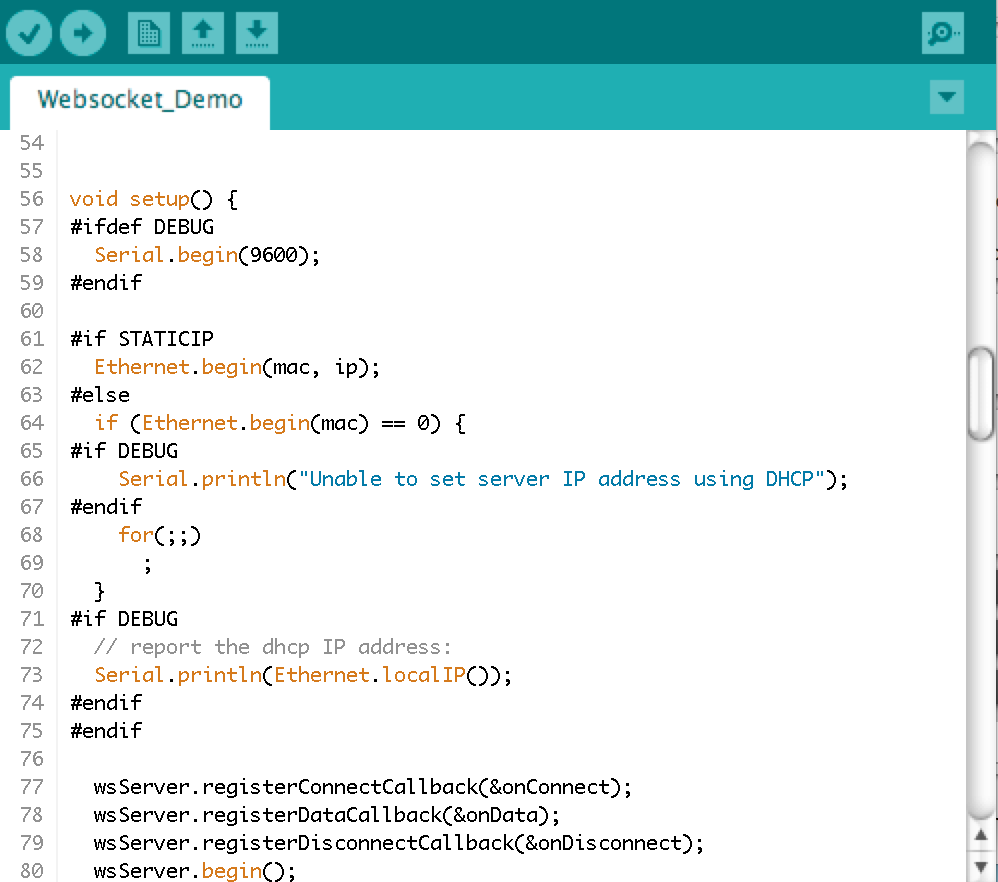
WebSocket client dizmo
Now, we are going to implement the dizmo that connects to the Arduino via WebSocket that gets notified when a gesture is recognized. Create a new dizmo project with Grace:
grace newUse the following parameters when asked by grace:
name: Gestures
type: dizmo
skeleton: default
Now, change into the new project directory:
cd Gestures
Edit the file src/index.html to add a textarea element, replacing the Hello World that was there already.
<textarea id="msg" data-type="dizmo-textarea"></textarea>Now, edit the file src/application.js and add the following code inside the dizmoready event handler function:
window.document.addEventListener('dizmoready', function() {
    ws = new WebSocket("ws://<insert ip address from above>:80/");

    ws.onmessage = function(evt) {
    window.console.log(evt.data);
    document.getElementById("msg").innerHTML=evt.data;
    };
    ws.onerror = function(evt) {
    window.console.log(evt.data);
    document.getElementById("msg").innerHTML="ERROR: "+evt.$
    };
    ws.onclose = function() {
    window.console.log("onclose called");
    });
    ws.onopen = function() {
    window.console.log("onopen called");
    ws.send("Hello, Arduino");
    };
    });
Build and zip the dizmo with Grace
python manage.py zipDrag the resulting file from the build folder into dizmoViewer.
Now, hold your finger a few centimeters above the sensor and move it left or right … you should see the sensed gesture in the dizmo.
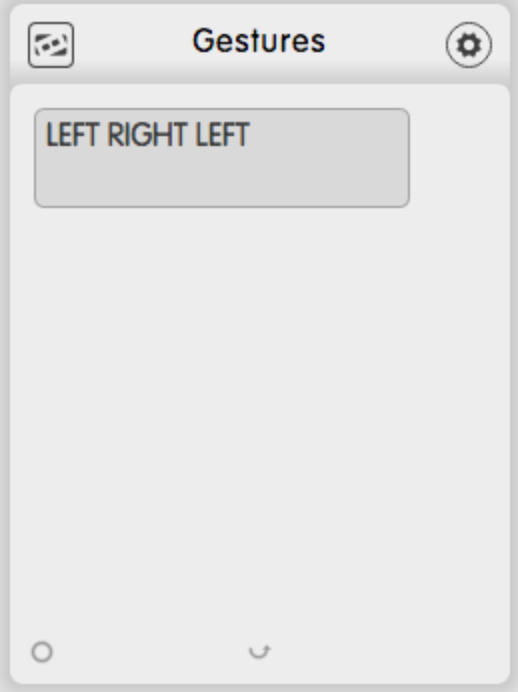
We are excited to see what you can do with this basic set of gesture support for your dizmos. Tweet us your ideas and implementations, using the hashtag #dizmonks!